Summer

Simple Weekday Salad

November 12, 2014

Simple Lunch Salad

I have been thinking a lot about what healthy living means to me. Eating whole foods, plenty of exercise, a good night’s sleep, rest (not to be confused with the prior), giving and receiving love, belly aching laughs, feeling self-worth, sunshine and so forth. Listed in no particular order because all equally important for my physical and mental health. I am wondering though, is it possible to be successful at all of these things? Seriously, it’s a lot to ask. Sometimes I don’t sleep well when my husband snores and sometimes I don’t want to ‘feel the burn’ in my thighs. I guess health is no exception, results require self-discipline, motivation, and hard work. So every day I try to be healthier than the day before. Sometimes I win and sometimes I lose. But every day is a new day and I try to remind myself if I have my health, I have everything.

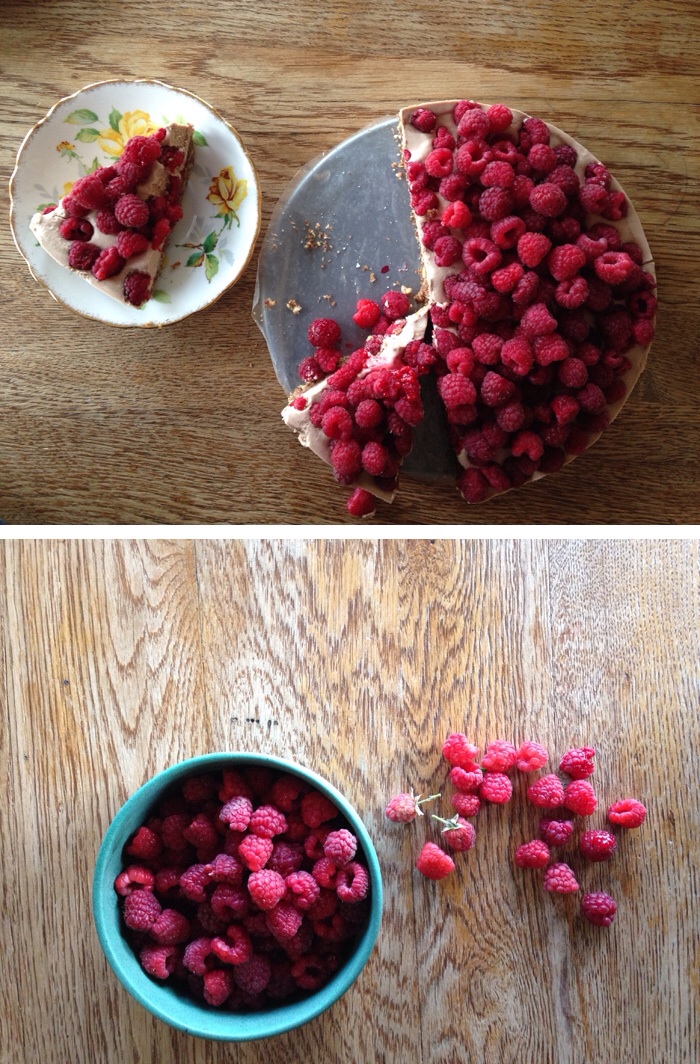
This recipe was inspired by a lunch I devoured in Cape Town. I cannot remember the name of this part market part café but I remember  thinking “I want to own a place like this”. It was the perfect place to share espresso and cake with a girlfriend, buy a gift on the fly, grab fresh flowers, read a book and drink a Pinotage, and stop for lunch every day! The lunch menu varied daily and was displayed in beautiful ceramics on a large wooden farm table. Maybe some day I can call it my own.

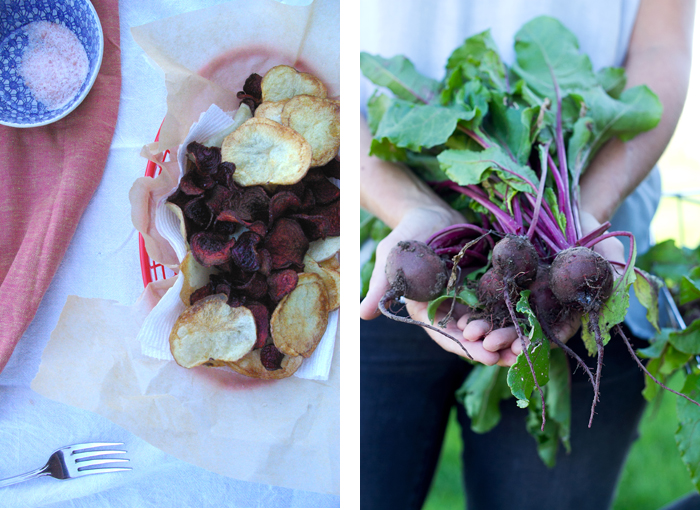
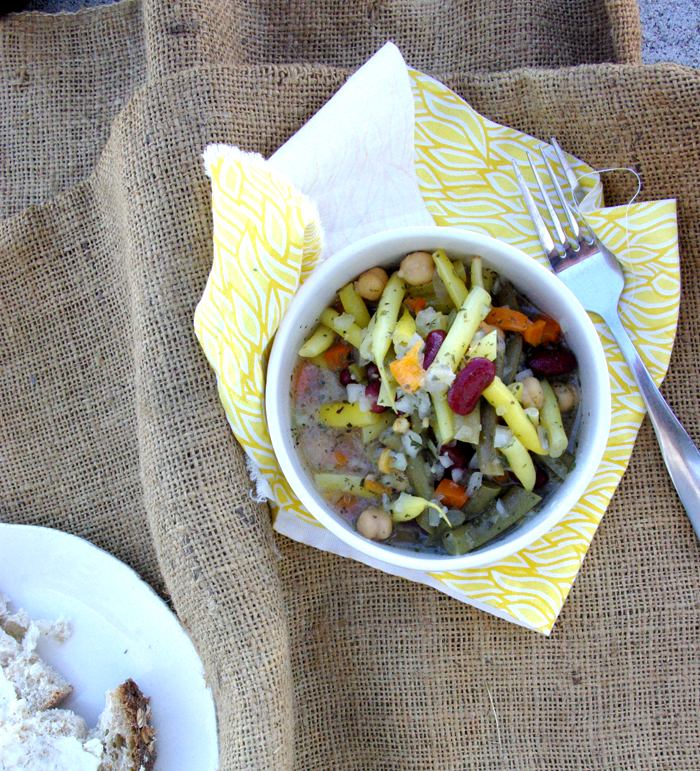
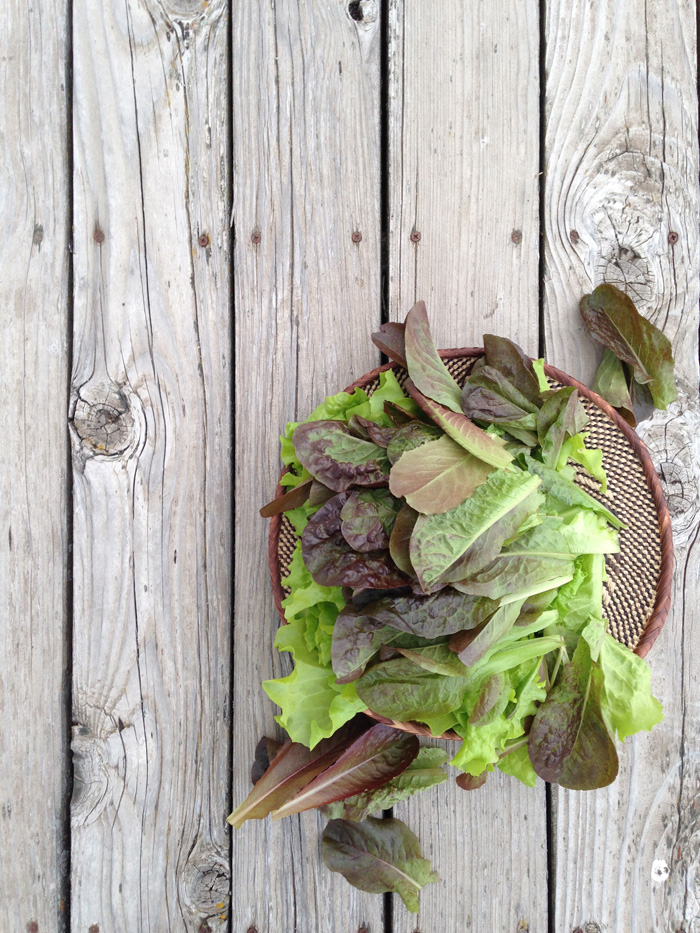
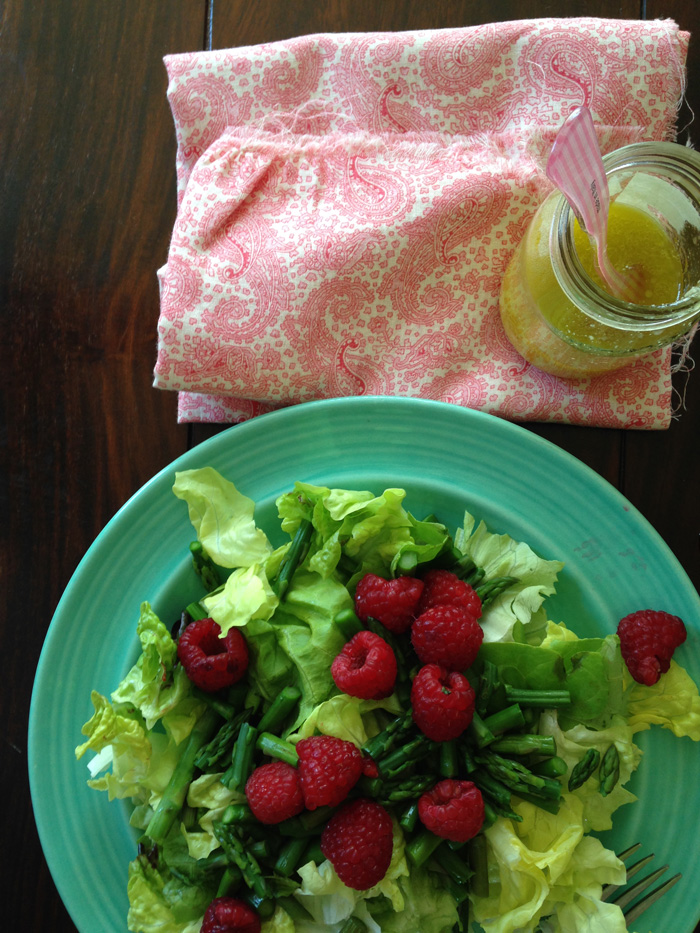
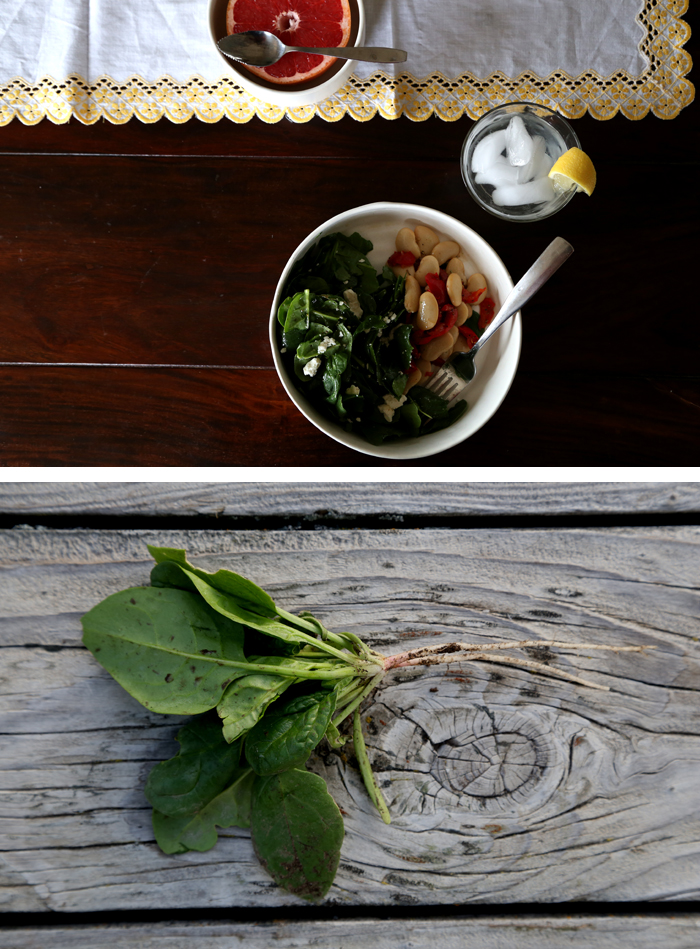
I harvested my last row of spinach a week ago. Pretty happy to be eating fresh greens from my garden in November. I recently requested a building project from my husband so if I am lucky I might be harvesting more fresh greens throughout the winter. Fresh spinach keeps well, even when dressed, so its perfect for a workday lunch.. The beauty of this salad is its simplicity without compromising taste. The sweet and hot cherry peppers are key. They make all the difference. I bought mine from Trader Joes during my last visit to CA. I have not searched for them around here but my first stop would be Front Street Market.

Simple Weekday Lunch // serves 4

WHAT YOU’LL NEED

Juice of 1 lemon and zest
1 Tbs. bean liquid from can
½ tsp sardine paste
1 tsp. fresh rosemary
1 Tbs. extra virgin olive oil (cold pressed and unfiltered)
1 15 oz. can butter beans, drained and rinsed
4 oz. sweet and hot cherry peppers, sliced
4 handfuls of spinach
4 oz. feta
White balsamic vinegar
Extra virgin olive oil

HOW TO MAKE IT

In a glass bowl, whisk together the lemon juice and zest, bean liquid, sardine paste and chopped rosemary. Slowly add olive oil while whisking to emulsify. Add beans and peppers to marinade and refrigerate for at least 4 hours.
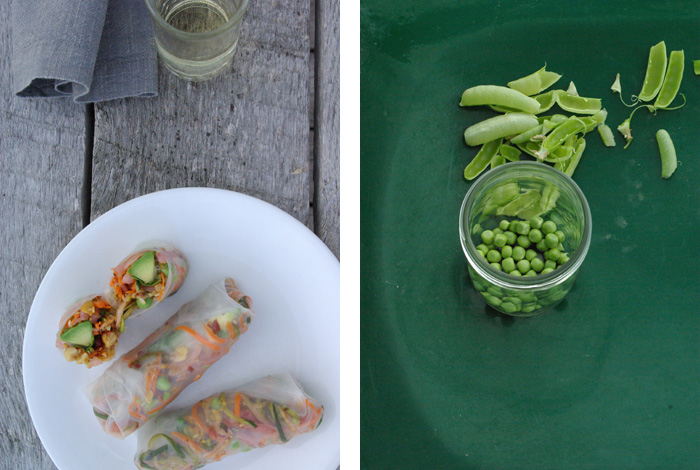
Toss spinach with white balsamic and olive oil. Crumble feta over top and add a large scoop of beans and peppers on the side. I used one handful of spinach, a splash of white balsamic and a drizzle of olive oil, and an ounce of feta per salad.

Big Sky

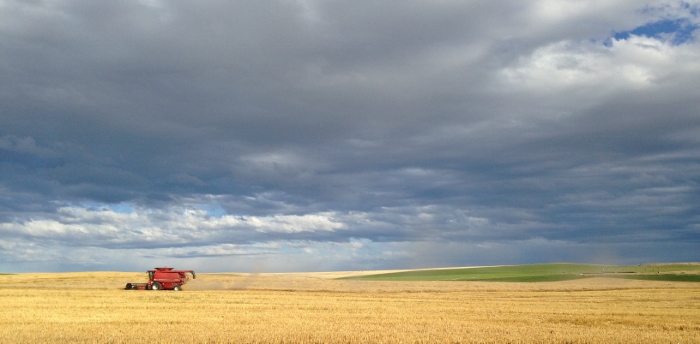
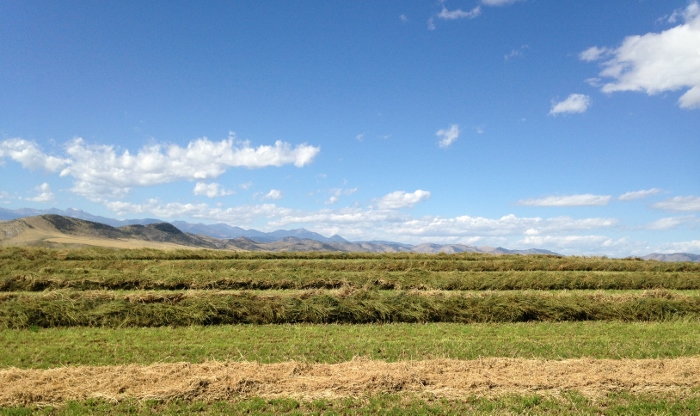
I had to share a couple photos of the Montana sky. This last month I have woke to a different colored blaze shining through to my kitchen. The perfect way to start the day. Rise and shine!

Vogue Gardening & Country Carrot Cake

October 12, 2014

Vogue Gardening

Can you believe my horse, Buddy, doesn’t like carrots or apples?

Carrots

I made this cake for my oldest sister’s birthday a couple weeks ago. It’s a traditional carrot cake with a couple twists. Currants in lieu of raisins, limited spices, and grated pear for extra moisture. I also included goat cheese in the frosting, unexpected tang with every sweet bite!

In case you want something less traditional, try this Cocoa Carrot Cake with Cocoa Crumble. I also made this a couple weeks ago for a party. Unlike the recipe, I baked mine in a 9”x13” pan for about an hour and cut into individual squares for serving. My take on a Coffee Cake with a W O W factor.

Celebrate the Indian Summer we have all been enjoying and EAT CAKE this week!

Black Betty

Country Carrot Cake // serves 12 to 15

1 ½ c. canola oil
2 c. sugar
3 eggs
2 c. grated carrots
1 c. grated pear
2 ½ c. flour
1 tsp. soda
½ tsp. salt
1 tsp. cinnamon
1 tsp. vanilla
½ c. currants

Preheat oven to 350 F.

With an electric mixer, mix together wet ingredients. Sift together dry ingredients and whisk together. Slowly add dry mixture to wet mixture in batches. Stir in currants.

Spray two 9-inch circular cake pans and line with parchment paper. Spray again and dust with flour. Divide batter into two pans and bake for 35 to 45 minutes. Insert a toothpick at 35 minutes. If removed and clean, cake is done baking. If not clean, bake for remaining 10 minutes.

Allow cakes to cool for 20 minutes. Run a knife along the edge and invert onto a cooling rack.

Frosting

8 oz goat cheese, room temperature
8 oz cream cheese, room temperature
½ c. butter, room temperature
3 Tbs. maple syrup
1 tsp vanilla
3 c. powdered sugar
¼ c. toasted pecans, for topping

In a mixing bowl with whisk attachment add cheese, butter, maple syrup, and vanilla and whisk until smooth. Add powdered sugar in batches and continue whisking until smooth and creamy.

I like to individually wrap the cooled cakes in saran and freeze before frosting. I think it makes frosting a cake a lot easier. I am not too methodical when it comes to frosting but here is a step by step process for mastering layer cakes.

Country Carrot Cake

Vogue Gardening – Wheat

September 29, 2014

Wheat

We finished seeding the wheat last week so I thought it appropriate I post the recipe for my favorite whole wheat crust. This is a family recipe that I often adapt with different ratios and flour types. I use the recipe shared here mostly for galettes since the wheat I use is stone ground straight from the field. The result is a grainy and rustic crust. Perfectly suited for a galette.

Ripe juicy peaches are the fruit of choice. But other stone fruits like plums, nectarines, or pluots are equally delicious substitutes. Since stone fruit season is near its end, apples might be the better option. Basically this is whole wheat crust recipe that can easily be adapted to suit the different fruit seasons.

I added a dash of ground tamarind to this peach galette. I first experienced tamarind while celebrating my sister’s marriage in the Yucatan. I had never heard of it let alone tried it. But if it was in the margarita form I was sure to take a liking to it! And indeed I did. Tamarind is a tree indigenous to tropical Africa but because of its many uses has spread worldwide in tropical and subtropical zones. The tree produces an edible, pod like fruit that is best described as both sweet and sour. I purchased my tamarind from Butterfly Herbs in Missoula, MT. A must stop for me every time I am in the area. The store has a whole wall showcasing a large variety of spices, teas, rubs, coffees, you name it.

Whole Wheat

Peach and Tamarind Galettes // makes 2 galettes and serves about 8 to 10

Crust

2 2/3 c. flour
1 c. shortening
1 tsp. salt
1 beaten egg for egg wash

Filling

6 ripe peaches
4 Tbs. honey
2 Tbs. tapioca flour
2 tsp. tamarind

Preheat oven to 400 F.

Cut the shortening into the flour with a butter knife until incorporated and about pea size. Add 7 to 8 Tbs cold water. Start with 5 Tbs. Continue to cut until flour, shortening and water come together. Add more water until it is sticky, but not too sticky. To check the dough, pinch with your fingers. If it stays together its done, if it falls apart it needs more water. Using your hands, form dough into a ball. Divide in two.

Lightly flour working surface and rolling pin. Roll out two crusts. I sometimes place a sheet of parchment paper on the counter with a little flour and roll out dough on parchment paper. Then the dough can be easily transferred to a baking sheet.

In a glass mixing bowl, core and thinly slice peaches. Add honey, tapioca flour, and tamarind. Mix so all peaches are coated.

Leaving a 2-inch border around edge, arrange peach slices close together in a circle on the dough. Arrange the remaining peaches in a smaller circle in the center. Fold the border partially over the filling, pleating the dough in loose folds. Brush the folded dough with a beaten egg. Slide the galette with the parchment onto a baking sheet. Bake the galette until the pastry edge is deep golden brown and inside is bubbling, 30 to 35 minutes.

I served warm with a dollop of plain Greek yogurt and a sprinkle of equal parts ground tamarind and sugar.

Peach Galette with Tamarind

Vogue Gardening & Corn Chowder

September 21, 2014

Corn on the Cob

My sister’s and I use to sell sweet corn at the Farmer’s Market in Bozeman when we were little girls. We would spend the night before picking and bagging the corn and then waked at the crack of dawn the following morning to help load all the gunny sacks in the back of the pick-up. Mom and dad would drive us to the market, park the pick-up in our usual spot, ensure we had enough change for the first couple of customers and then give us the thumbs up. We quickly learned our strengths and settled into our positions. The accountant, the laborer, the supervisor and the marketing director. Can you guess who was who? We had fun and learned valuable life lessons. Thanks mom and dad.

So it’s not surprising that I still like to frequent outdoor markets. Even though most produce was plucked from my own garden this summer I often supplemented my baskets with different varieties offered at the market or by a generous neighbor and/or friend. Wandering aimlessly through outside markets is probably one of my favorite ways to pass time. I would start every morning at a market if I could. Nothing suits me more than a basket of produce on the shoulder and a hot beverage and pain au chocolat in hand. I find myself inspired and invigorated after markets and thankful for farmers and ranchers.

It snowed a week or so ago. It warmed up again but the Autumn air is not to be mistaken. So I decided to make this corn chowder for dinner last week. It’s a family favorite. Everyone looks forward to the invite. I often diversify the soup with different toppings. This time, I added a heaping spoonful of tangy roasted poblano salsa. Sometimes its avocado and creme fraiche. Other times it’s a dollop of Greek yogurt and fresh herbs. Be creative but be sure to try this tangy poblano salsa at least once!

Corn Chowder

Charred Corn Chowder with Tangy Roasted Poblano Salsa // Serves 4 to 6

5 or 6 ears of corn on the cob, about 2 c. of kernels for the soup
1 medium onion, diced
4 celery stalks and greens, chopped
1 tsp. parsley
1 tsp. ground cumin
pinch of red pepper flakes
2 garlic cloves, minced
1/4 c. quinoa
1/4 c. white wine
1 quart vegetable stock
1 c. coconut milk
2 oz. goat cheese ricotta

Tangy Roasted Poblano Salsa

2 poblanos
1/4 red onion, about 1/2 c. diced
1 to 2 limes
1 Tbs. extra virgin olive oil
1/2 ear of corn

Heat grill to 400 F. Char corn and poblanos on all sides. Remove from grill and allow corn to cool before handling. Place charred peppers in a plastic bag, twist the top closed and allow to steam until cool to the touch, about 15 minutes. Peel off the charred skin and chop poblanos.

In a large stock pot, heat 1 to 2 Tbs. oil to medium. Add onion and celery. Cook until softened and translucent. Add spices and garlic. Rinse quinoa and add to stock pot and toast for about 1 minute. Add white wine and cook until absorbed. Add vegetables broth, bring to a boil and then turn heat down to a simmer until quinoa is cooked. About 15 to 20 minutes. Cut corn kernels from cob and add to stockpot. Reserve 1/2 a cob for the salsa.

Pour half the soup into a food processor or blender and puree. Transfer back to stockpot and add coconut milk and ricotta. Stir until incorporated and turn heat to warm.

In a mixing bowl, add chopped poblanos, diced red onion, corn kernels from 1/2 ear, lime juice, and olive oil. Stir and add salt and pepper to taste.

Serve soup with a heaping spoonful of salsa.

Vogue Gardening & Beet Chips

September 10, 2014

Beets

I am excited to unwrap the next four posts of Vogue Gardening for which I collaborated with the very talented and sweet Lydia Zarling. A self-taught portrait photographer, Lydia’s photos capture a kaleidoscope of color that highlight the essence of nature’s bounty.

She resides in Missoula, Montana but she often travels. Her work mostly consists of portraits but she also enjoys taking pictures of animals, wildlife and sporting events. Her recent interest in fashion photography has highlighted her artistic hand. Doubling as a make-up artist she can create art in real life and capture it behind the camera.

“The more I shoot, the more I learn about the creativity, simplicity & edge to my photography.” ~Lydia Zarling

You can view more of her work on Instagram here. and Facebook here.

Beets are the featured vegetable for Vogue Gardening this week and carrots, sweet corn and whole wheat will be featured throughout the remaining weeks of September along with tasty recipes that will leave you longing for the inevitable change in seasons. I will transition into Autumn with juicy apples and creamy squash to conclude the summer series.

Vogue Gardening

Earthy and eager to stain, this vegetable can be a tough sell. So, I wanted to share a recipe that maybe even the least of beet eaters would enjoy.  To prove these beet chips are for haters and lovers alike I called my Dad to join me for a late afternoon snack. I paired the beets with potatoes (pure distraction) and served with a cold brew. I can attest, both are sure to please!

Originally, it was the beet greens that were consumed. It wasn’t until the Ancient Roman era that the sweet beet root was cultivated. I appreciate the earthiness and texture of beet greens so I often make a rough pesto with each beet harvest. It’s a favorite of mine served over steak.

Red Beet Chips

Beet Chips // serves about 6

1 small bunch of red beets, about 4-6
Canola oil
Seal salt to taste

Wash beets and thinly slice. I used a mandolin on the second setting, but you could also use a knife. Just be sure to slice them very thin so they fry quickly.

Add canola oil to a fry pan and heat until thermometer registers 350 F. If you do not have a thermometer, test oil temperature by adding one beet chip. If it sizzles and fries, the oil is hot enough. Add beets chips in batches and fry until crispy and outer edges start to turn golden brown. About 4 to 5 minutes. Be sure to not overcrowd pan with beets, as oil temperature will decrease and they won’t fry well.

Remove beet chips with a slotted spoon. Place on a plate lined with paper towels. Sprinkle with sea salt. Repeat until all beets have been fried.

Allow oil to cool, then filter, and store it in a cool dry place for reuse. I will only reuse it once. If you are unsure if you should use it again, check the color and smell against fresh oil.

Food & Farming – Four Bean Salad

September 4, 2014

Four Bean Salad

My mother brought me leftovers from her annual quilting party. FOUR BEAN SALAD. She said it was bright in color and I should give it a try. She thought I might want to blog about it. Well she was right, and typically I am not a multi-bean salad doer. Thanks for sharing your recipe Maureen!  I ate four bean salad for four days. No joke!

I decided to adapt the recipe every so slightly. Decided it was the perfect recipe for all my fresh garden beans. I used 1 lb. 12 oz. of beans but any weight close to that would work just fine. The recipe shows this salad serving 6 to 8 people, true when eaten for a light lunch or dinner. But if served as a side salad, it is plenty for a picnic or BBQ gathering. And speaking of picnic and BBQs. This salad is ideal for entertaining or the outdoors. Best made ahead of time and tastes better with each marinating day. Like I said, I ate it for four days and equally pleased on the last day!

Head to the Farmer’s Market this weekend and buy a bag of beans!

FOUR BEAN SALAD // Serves 6 to 8
Adapted from Maureen Nordahl

1 lb. 12 oz. fresh beans (I used a mix of green and yellow wax beans)
1 ½ c. sweet onion, about 1 large onion
1 bell pepper, I used orange
1 can garbanzo beans
1 can kidney beans

VINAIGRETTE

½ c. distilled white vinegar
½ c. grape seed oil or any other neutral salad oil
½ c. sugar
1 tsp. sea salt
½ tsp. dry mustard
½ tsp. tarragon
½ tsp. basil leaves
2 Tbsp. parsley leaves

Wash fresh beans and snap off ends. Blanch fresh beans in a large stock pot of well salted boiling water until bright green and yellow in color and tender crisp, roughly 3 to 5 minutes. Drain and shock in a bowl of ice water to halt further cooking. Drain beans from ice water and cut beans in thirds.

Dice onion and bell pepper. Drain and rinse canned beans. Add all ingredients to a large serving bowl.

Whisk together all ingredients for the vinaigrette and pour over salad. Toss so everything is well coated. Refrigerate for a couple hours before serving. The longer it marinates the better!

Harvesting Wheat

Haying

We finished harvesting the wheat yesterday. What a relief since the weather has started to turn. The mornings and evenings are chilled and the afternoon air feels like Autumn. We have yet to finish the second cutting of hay. Typically we are finished with this mid August. But unusual weather patterns has extended the haying season. Fingers crossed for some warm afternoons. For the hay and for me!

No Bake Gluten Free Dairy Free Raspberry Tart

August 8, 2014

Part 3 of the Vogue Gardening Series features fresh raspberries.

Vogue Gardening

I have been picking raspberries for a good week now thanks to my good friends. Their garden is beautiful and their raspberry bushes are plentiful. The bushes were transplanted from the family farm in South Dakota. I was lucky enough to get a number of starters from them this Spring. Though alive and well, I can’t say my raspberry bushes were quite as bountiful as theirs. Perhaps in a couple years, til then, thanks for sharing your harvest.

When fruit is picked ripe and succulent straight from the tree/bush I resist changing its form from pure and fresh. I like to eat it raw so I can taste the freshness highlighted from a garden harvest. So this dessert is piled with fresh raspberries. Nothing to muddle the flavor but a hint of coconut and slight nuttiness from the crust. That’s why I love it. And who though gluten free and dairy free could taste so darn good.

This no bake tart is incredibly quick and easy.  Dessert without the repercussion of a hot house is incredibly nice during these dog days of summer. If you prefer something a little richer and more decadent, I could definitely taste this crust with an ice cream filling and chocolate sauce drizzled over the raspberries. Just a thought if you aren’t counting calories. Cause who really does, right?!

Vogue Gardening Raspberries

No Bake Gluten Free Dairy Free Raspberry Tart // serves 8 // Adapted from Sprouted Kitchen

Crust

9 dates, pitted
1 c. toasted almonds
1 c. almond meal
2 Tbs. butter, melted (coconut oil for dairy free option)
1 tsp. cinnamon
1 Tbs. unsweetened cocoa powder
1 tsp. vanilla

Add all ingredients to a food processor. Pulse until coarse and sticks together when you pinch it with your fingers. Depending on the moisture in the dates, a tablespoon or two of cold water might be needed.
Line the bottom of a 9-inch spring form pan with parchment paper. Pour mixture into pan and press into an even layer.

Coconut Cream

1 can coconut cream or full fat coconut milk, refrigerate over night
3 Tbs. powdered sugar
1 tsp. vanilla paste or extract
4 c. fresh raspberries

Scoop coconut cream out of can and discard liquid or use for smoothies or something of the sort. In a mixing bowl with whisk attachment, beat coconut cream on medium high just until peaks form. Add powdered sugar and vanilla and continue to beat until peaks form.

Spread coconut cream in an even layer on crust. Sprinkle 1 1/2 c. of raspberries on top and gently press into coconut cream. At this point I like to freeze for about 1 hour to get a good chill on the coconut cream. Remove from freezer and top with remaining raspberries. Refrigerate until ready to serve.

Store covered in the fridge for a couple days, if it lasts that long!

I used Trader Joe’s coconut cream. I absolutely love it. I have not found coconut cream anywhere else. So if you do not live near a Traders than use canned full fat coconut milk. Don’t forget to refrigerate over night so the cream can separate from the liquid.

Raspberry Tart a Pitchforks & Pomegranates

Spring Rolls with Fresh Peas

August 1, 2014

Part 2 of the Vogue Gardening Series features fresh peas.

Pea Shoot

I prefer to plant peas that mature in an edible pod. So this year I planted one variety called the Sugar Ann Snap Pea. The dwarf vines grew tender pods about 3-inches in length with sweet flavored peas. A healthy afternoon snack.

I planted two rows in different areas of my yard. The deer found one row and my kittens played in the other. So needless to say, my pea harvest was minimal . The Sugar Ann Snap Pea matures in about 56 days so I am thinking of planting again next week in hopes for a fall crop.

Peas grow best in cooler weather and young pea plants can tolerate considerable cold and even a light frost. So here in Montana peas are one of the first vegetables to be planted in early Spring. This year, I think all the master gardeners in the community planted their peas the first or second week in April. I was busy soaking up the sun in South Africa so my peas did not get planted until late April, which explains why I was a little late harvesting. I was told numerous times that I should have been eating peas on the Fourth of July. I know. I know. I have yet to cook the infamous pea and potato mash for the Fourth. There is always next year.

Since I just finished my 30 day cleanse a week or so ago I am still trying to craft recipes that are gluten, dairy and sugar free. There is a small amount of sugar in the pickling liquid but I consider this a healthy recipe that boasts fresh flavors from the summer garden. I was afraid the pickled zucchini and red onion would over power the fresh flavor of the peas but to my surprise the peas stood their ground.

I hope you enjoy!

Spring Rolls

Spring Rolls / makes about 10

Pickled Zucchini and Red Onion (see below)
3/4 c. fresh shelled peas (100 grams), chopped
2 medium carrots, julienned
1/3 c. Valencia sweet and salty peanuts, chopped
1 tsp. fresh ginger, grated
1 lime, juiced
1 Tbs. sesame seeds, toasted
1 avocado
Thai basil for garnishing
pinch of salt and pepper
1 package of rice spring roll wrappers
Peanut sauce for dipping

Strain pickled zucchini and onion. Add strained pickled zucchini and onion to a medium sized bowl. Add chopped peas and peanuts, julienned carrots, grated ginger and juice of one lime to filling.
Add one tablespoon of sesame seeds to a small skillet over medium heat. Toast sesame seeds for about 1 minute. Keep a close eye on seeds to prevent burning. Add toasted sesame seeds to bowl.
Mix all ingredients together.
Place rice wrapper in warm water until it is soft and pliable (approx 15 to 20 seconds). Remove the wrapper and gently lay onto a wet tea towel. Place filling in the middle of the wrapper. Add 2 to 3 basil leaves and a slice of avocado. Fold over the bottom and sides. Roll wrapper upwards to form a neat roll shape.
If you want to include a dipping sauce, I used a store bought peanut sauce. But to be honest, the spring rolls have so much fresh summer flavors I preferred them as is.

Pickled Zucchini and Red Onion

1/2 red onion (4 oz.)
1/2 medium to large zucchini (6 oz.), mine was about 2-inch in diameter
1/2 c. distilled vinegar
1.2 c. apple cider vinegar
1 Tbs. sugar
1/2 tsp. salt
1/2 tsp. fennel seed, oregano, mustard seed and black peppercorns
1/4 tsp. red pepper flakes

Thinly slice red onion and julienne the zucchini. In a small sauce pan over medium heat add vinegar, sugar, salt and spices. Stir until sugar is dissolved.
Fill a quart glass jar with zucchini and onion and pour vinegar mixture over vegetables. Add lid, shake around and refrigerate. I would recommend refrigerating at least overnight. I waited for about 2 days and it was delicious.

Introducing the Vogue Gardening Summer Series

July 16, 2014

Vogue Gardening

I try to eat seasonally. It’s the only way to taste food in its purest form. I believe recipes should be inspired by the colors of farmer’s markets and gardens. Depending on where you live, this is easier said than done. When I lived in California, farmer’s markets were a weekly ritual for me. Now residing in the countryside of Montana, I find it rewarding to eat from my own garden. The growing season is short, starting with lettuce varieties in May and ending with a plethora of squash in October. So I have decided to celebrate the colors of summer and my gardens bounty with a Vogue Gardening Summer Series. Each garden harvest will feature a recipe and fashion photo pairing. Why food and fashion, because both are a beautiful display of color, texture and pattern. And I like the juxtaposition of a fashionable woman in a country garden. So brace yourself for vibrant outfits and food flair in the coming weeks.

Vogue Gardening Summer Series

I planted my first batch of leafy greens in early May. Maturity dates varied around 40-60 days. So I was eating fresh garden greens in early June. I harvested two cuttings on almost all the varieties. After that some of the varieties started to bolt. I planted a second group that included my favorite varieties in early June. So that batch has been ready since early July. You can imagine how many fresh salads I have been making in the last couple of months. And there seems to be  no sign of slowing down. So if you are local and want a fresh bag of garden greens give me a shout. I would love to share the bounty!

Some of my favorite garden greens planted this year include:

Goliath Spinach, think spicy green harissa
Black Magic Kale, eat stems and all
Tangy Mesclun Mix, perfect for salads
Black Seeded Simpson Heirloom Lettuce
Marvielle of Four Seasons Lettuce, a reliable butterhead variety
Bibb Lettuce, delicious crispy leaves

Garden Greens

With garden greens being the featured harvest, I have included the recipe for my go-to vinaigrette. My sisters are always asking me how I make such tasty salad dressings. I think the key to any dressing is quality oil. Most my dressings include olive oil but certain salads might call for a mild less flavorful oil like grape seed or on the flip side an oil with a dominant flavor like sesame or walnut. But in my opinion,whatever oil is being used buy quality. For the use of condiments and vinaigrettes I think it is important to select an Extra Virgin Olive Oil in a dark container with a natural peppery finish and a deep green aroma of grass. I look for less expensive oil for cooking. Look for labels like cold pressed, unfiltered and organic. There are lots of specialty stores that allow you to taste the different varieties before purchasing. This is important since they are so expensive. And remember to store the oil in a corner in your kitchen that is cool, dry, and dark.

I make this vinaigrette a lot. Right now with all the lettuce varieties from my garden I make it weekly and refrigerate it. This way I always have quick lunch or dinner on hand. Its simple, fresh and tangy. In my opinion, it makes all garden greens pop. It’s also quite versatile. I often drizzle a little on my morning fried egg or add to beans and asparagus. I think you will find all greens take a liking to it, just get creative!

Kate’s Go-To Vinaigrette

1/2 c. lemon juice, approx 2 lemons
1 Tbs Sauvignon blanc or another crisp clean white wine
1 Tbs Dijon mustard
1 tsp grated ginger root
1-2 garlic cloves (to taste), grated
1/4 c. olive oil

Add lemon, wine, mustard, ginger and garlic and give a quick whisk. Continue whisking as you pour in the oil. It’s that easy! I like to grind salt and pepper on the salad rather than in the dressing.

Kate's Go-To Vinaigrette

Food & Farming

July 8, 2014

Since I’m talking about food & farming. The Farm to Table Field Dinner is coming up. Have you bought your tickets yet? We have been prepping the site. The area has been mowed, weed-eated and bladed. Next week we will spread wood chips, hang lights and build fire pits. So excited, don’t miss it. Only one event this year.

food & farming

I know what you are thinking. This jalapeno and dill pickle burger with whipped feta is not a cleanse friendly recipe. You’re right. That’s my husband’s dinner. Substitute the gluten and dairy for garden greens and that’s my dinner. A dinner I actually eat more nights than not. It’s true.

I made this whipped feta for the first time a couple months ago. It’s delicious. You will want to smear it on everything. And trust me, I did. Just one more reason why I started a 30 day cleanse! Since dairy is not my friend for 15 more days, I can’t say I have actually tried the whipped feta with the burger. But I decided it was post worthy from my husband’s feedback. Give it a try and report back!

Jalapeno and Dill Pickle Burger

Jalapeno and Dill Pickle Burger with Whipped Feta and Tomato

1 pound hamburger
1/3 cup pickled jalapenos, diced
1/3 cup dill pickles, diced
2 tablespoons dijon mustard
4 multri grain with flax buns
4 ounces feta cheese crumbles
3 ounces whipped cream cheese
2 Roma Tomatoes
salt and pepper

With the metal whisk attachment on mixer, whip feta crumbles until they just start to clump together. Add whipped cream cheese and continue whipping until creamy and smooth. Add a pinch of salt and pepper to taste. I used whipped cream cheese but you could use regular. Just make sure it is at room temp so it whips well. Set aside for later

Dice jalapenos and pickles. In a medium sized bowl, add hamburger, pickles, jalapenos, mustard, and salt and pepper. Mix together all ingredients with clean hands. Form four (1/4 lb) patties. Leave a dent in the middle, for a flat cooked patty.

Heat grill. You want it hot! Add patties and grill each side until cooked through. I like mine grilled with a nice crust on the outside and pink on the inside. Toast buns on the grill right before removing burgers. Remove burgers and allow to rest for a couple of minutes.

Place the burgers on the bottom half of the buns and add whipped feta and tomato slices to top half of the buns.

Enjoy! READ MORE

Copyright © 2024 Katie Sue Cooper. Theme by Maiden Sites