Sweet Tooth

Giveaway + the Mercantile

March 17, 2015

Hot Cocoa and DRAM pine syrup flavored whipped cream

hot cocoa with pine flavored whipped cream

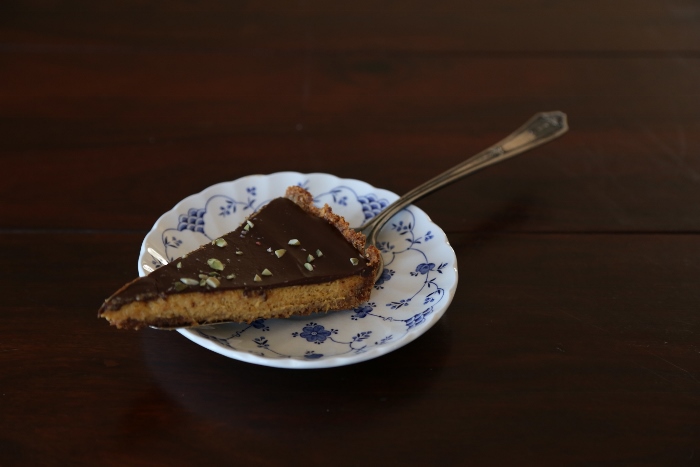
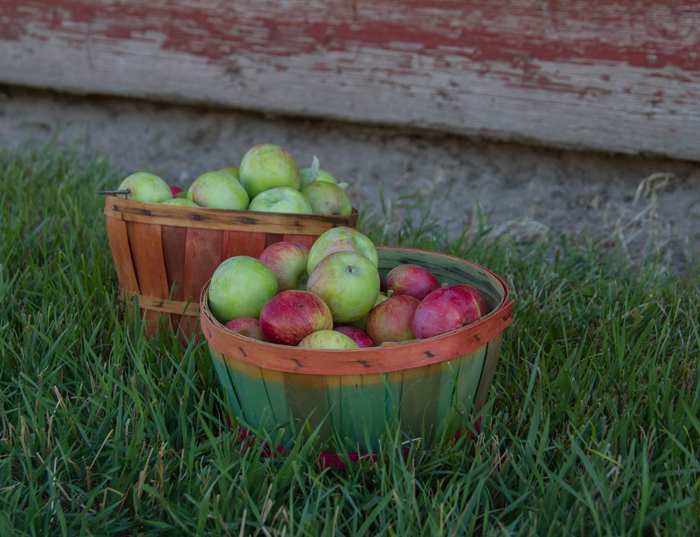
Do you remember DRAM, the Colorado based apothecary selling a variety of organic bitters and syrups? Back in October Owner and Alchemist, Shay Whitney, was generous enough to giveaway a selection of bitters and syrups on P&P. And now we’re giving away a bottle of the Pine Syrup.
“The pine syrup is deliciously unusual, the bottled taste of the Rocky Mountains. This syrup has a fresh pine flavor with hints of citrus and woody spice, imagine the wonderful aroma of a Christmas tree, NOT PineSol.” ~DRAM

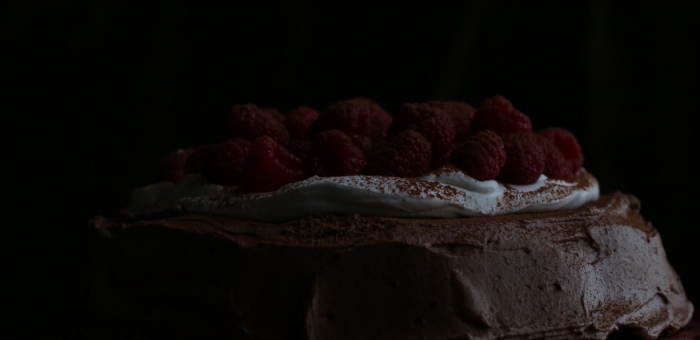
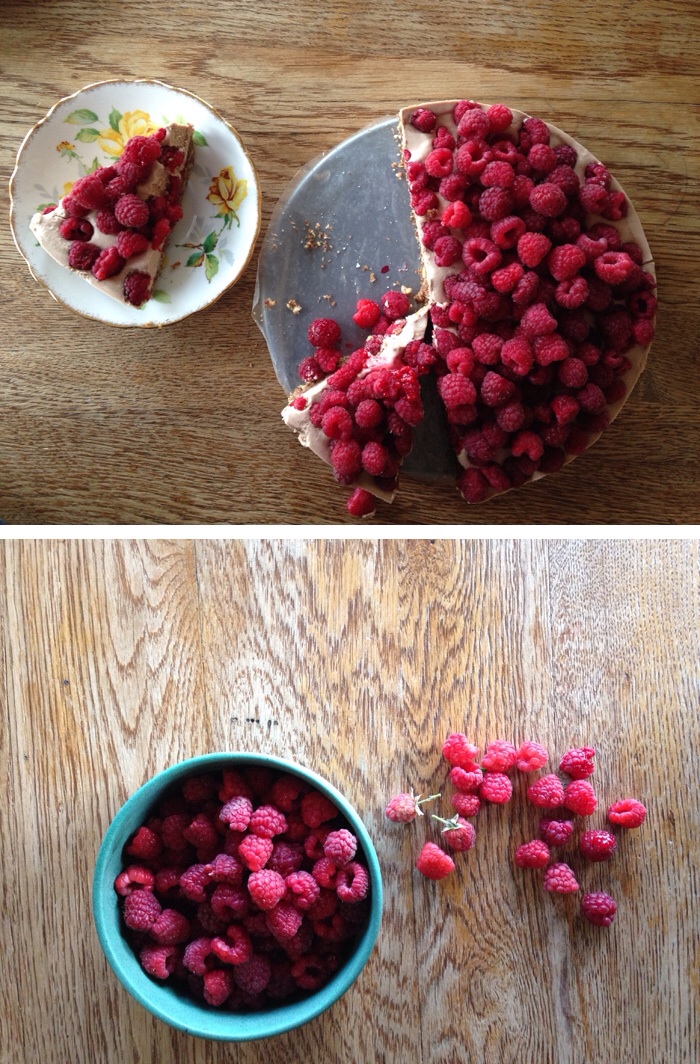
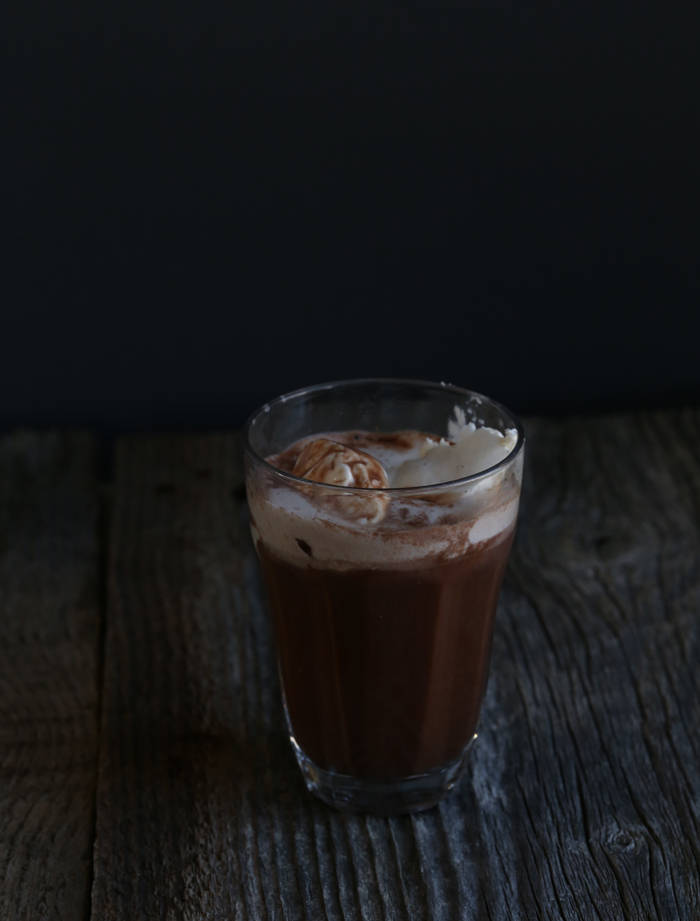
Need some ideas on how to use Pine Syrup. Shae likes to combine with sparkling water to create a refreshing soda or add to cocktails for a unique twist. It’s also wonderful with baked goods, meats and teas. I tried the pine syrup as a sweetener for homemade whipped cream and I give it two thumbs up!

I presume everyone here has made a cup of hot chocolate. But if you would like to give the pine syrup whipped cream a try, simply add 4 Tbs of pine syrup to 1 pint of cream and whip until stiff. (Amount of pine syrup may vary depending on your taste.) Please note that since you are adding a syrup, the cream will be less stiff than expected but completely adequate for dolloping!
For a quick cup of hot chocolate I like to use Sarabeth’s all-natural mix here or make Cook’s Illustrated dry cocoa mix below.

Hot Chocolate Mix / Makes 3 Cups; enough for twelve 1-cup servings / Cook’s Illustrated

1 c. sugar
6 oz. unsweetened chocolate, chopped fine
1 c. unsweetened cocoa powder
½ c. nonfat dry milk powder
5 teaspoons cornstarch
1 tsp. vanilla extract
¾ tsp kosher salt

Process all ingredients in food processor until ground to powder, 30 to 60 seconds. Transfer to airtight container and store at room temperature for up to 2 months.

To enter the giveaway, tell us in the comment section below: How do you make your hot chocolate? We’ll pick a winner by Tuesday March 24th!

Blue Flax Bowl

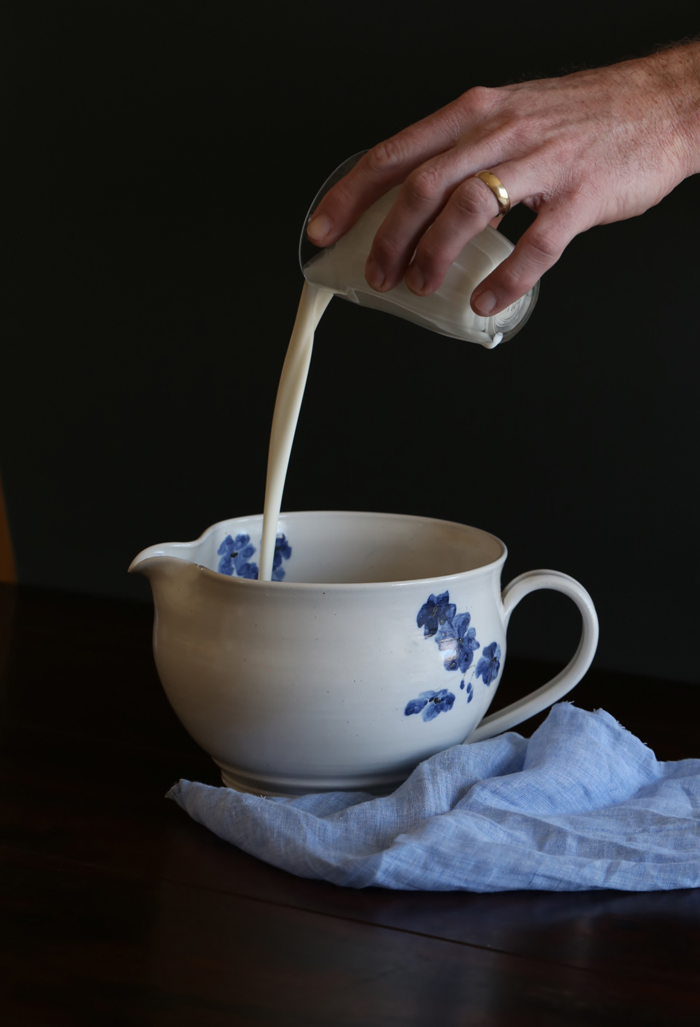
I am also excited to announce another artist has been added to the Mercantile, long-time family friend Kim Norby. Kim’s work is influenced by Scandinavian designs and artistic landscapes. She has a great gift for linear drawing and freeflow design; making pots that are aesthetically rich as well as functional is important to her. Kim and husband Thom currently reside near the town of Sundance in the Black Hills of Wyoming. They are both makers and artists and have been making pottery full-time since 1986.

Kim and Thom use to to nest in my hometown. They lived in a charming craftsmen style house with a studio in the backyard. When I was just a tike, I spent hours at their property playing in the creek and watching them work in the studio. I was fascinated by the potter’s wheel and kiln. I have so many fond memories of Kim and Thom and am reminded of our relationship every time I pass their old home and pull a pencil from collected mishaps. So when I started the Mercantile I immediately thought of Kim’s blue flax series from my childhood days. I asked her if she would create a bowl with the painted blue flax and I am thrilled with the outcome and over the moon to be selling Kim’s work on the Mercantile. The bowl can be purchased here.

Flourless Chocolate Quinoa Cake with Chocolate Ganache Glaze

February 5, 2015

Gluten Free Chocolate Cake

I love to gather good food and friends around the table. It’s my way of contributing to and nourishing the relationships in my life. I think a cooked meal is the perfect way to say I care for you.

I recently made this cake for a small gathering. My Auntie V passed this recipe along to me. She is quite a cook and baker so I always trust her recommendations. But I thought I might be stepping out on a limb with a quinoa dessert for men. I know my husband would be disappointed with the discovery of quinoa replacing flour. However, when I was in the kitchen glazing this decadent chocolate cake he stopped to ask me if the cake was for photographing or eating! So, I think the quinoa can be our little secret!

The recipe for this gluten free chocolate quinoa cake can be found here. I made a couple slight modifications. I added a ½ teaspoon of almond flavoring to the wet ingredients and I used 2 teaspoons of baking powder instead of the recommended 1 ½ teaspoons. My Aunt mentioned that her cake fell in the center so I thought I would try adding a little more leavening agent, and to my surprise no sink hole. If you add extra baking powder let me know if it works for you too. Also for the chocolate glaze I made homemade whipping cream instead of using Cool Whip. I beat 1 cup of heavy whipping cream with 3 Tablespoons powdered sugar and 1 teaspoon vanilla paste. I then beat the cooled chocolate into the whipping cream and spread over the cake and refrigerated. I whipped the remaining cream from the pint and again added 3 Tablespoons powdered sugar and 1 teaspoon vanilla paste. I removed the cake from the fridge and spread a little over the chocolate glaze and topped with raspberries. I refrigerated again until dinner. I had extra whipped cream so I froze a couple dollops for hot cocoas on another day.

What better way to say I love you then with a big piece of chocolate cake for Valentine’s Day! This flourless chocolate quinoa cake is a must try! Incredibly decadent and very German chocolate-esque.

Flourless Chocolate Cake with Chocolate Ganache and Raspberries (700x340)

Pumpkin Tart

November 20, 2014

pumpkin tart

Thanksgiving

I am sharing a Thanksgiving Day recipe. It’s a pumpkin tart with a chocolate glaze and crust made with graham crackers, pecans and dates. Pumpkin is a favorite of mine except for pumpkin pie. I think I ate too much pumpkin pie with my Dad when I was just a girl. So I wanted to create something similar to pumpkin pie that I might like. So of course I added chocolate and an irresistible crust.

I made the pumpkin puree from scratch. My Mom had a Sugar Pumpkin from the garden in cold storage so I thought, why not. I cut the pumpkin in half, removed the seeds and gunk, and baked it at 400 degrees until soft. (Note: I added a little water to to the baking pan so the pumpkin would steam.) Baking time will vary with size. I think it took about 45 minutes for a medium sized one. I let it cool just enough where I could handle it and then I peeled the skin back on most of it and the remaining I scooped with a spoon. I pureed the pumpkin using a food processor. Looking at it on a baking tray, I thought I would barely get enough for one tart. Bad judgement because I have made two tarts now and probably have enough for 2 more. Pumpkin puree is not a lot of work but obviously takes more effort than cracking a can.

It’s officially Winter here in Montana. We have been experiencing the Arctic Blast. Subzero temperatures and snow for over a week now. Dad says we need the South wind to come through and clear the weather. Not sure I like the sound of wind either. Tough decision but I think if I had the choice I would pick the cold over the wind. Fortunately, we worked most the cattle the week prior to the Arctic Blast when temps were in the 60s. We worked the last group yesterday and I am happy to say temps peaked in high 30s! Hard to believe 30s feels comfortable now.

arctic blast

Pumpkin Tart

WHAT YOU’LL NEED FOR THE CRUST
12 graham crackers
1 c. pecan halves
6 medjool dates, pitted
5 Tbs. unsalted butter, melted
1 tsp. salt
1 tsp. vanilla extract

WHAT YOU’LL NEED FOR THE FILLING
5 oz. chevre goat cheese, room temperature
1/2 c. granulated sugar
1/4 c. brown sugar
1 1/2 tsp. cinnamon
1/2 tsp. each of nutmeg and ginger
3 eggs (2 yolks and 1 whole)
15 oz. pumpkin puree (1 can)
2 Tbs. cream
1 tsp. vanilla

WHAT YOU’LL NEED FOR THE CHOCOLATE GLAZE
1/2 c. chocolate chips (60% or higher)
2 Tbs. unsalted butter
1 Tbs. cream
2 Tbs. light corn syrup

WHAT YOU’LL NEED FOR GARNISH
1 tsp. pepitas, chopped
Whipped cream

HOW TO MAKE IT

Preheat oven to 350 degrees.
In a food processor combine all ingredients for the crust. Pulse until mealy and clumps when pressed together with fingers.
Grease a 11-inch circular tart mold with butter. Empty crust mixture into tart mold and press along sides and base to form an even crust. Bake for 12 to 15 or until slightly browned. Remove from oven and cool.

With an electric mixer and whisk attachment, combine goat cheese, sugar, and spices. Whip until creamy. Add egg yolks and egg, beating after each addition. Add pumpkin puree, cream, and vanilla and continue whisking until all ingredients are combined and filling is smooth. Pour filling into cooled tart crust and bake for 40 minutes or until center does not jiggle. Remove from oven and cool.

Using a double broiler, add chocolate, butter, and cream. Stir until completely melted and smooth. Stir in corn syrup without incorporating air. Remove and pour over cooled pumpkin tart. Spread evenly. Garnish with pepitas and whipped cream.

Best eaten day of. No problem here.

HAPPY THANKSGIVING!

Pumpkin Tart

Vogue Gardening + Apple Frangapaine Tart Drizzled with Salted Caramel

October 30, 2014

Vogue Gardening

Apple

It has been a couple weeks since my last post. I have been busy traveling and also testing apple recipe after apple recipe, both savory and sweet. I tried an apple and brussel sprout pickled slaw that topped my favorite squash soup. I grated apples for a chia seed breakfast porridge. Of course a variety of pies, tarts and galettes. But I finally decided to share this apple frangapaine tart drizzled with salted caramel. I thought it might be a Thanksgiving Dinner worthy dessert! It is quite simple but does include multiple steps. If you are in a pinch, the prep time could be greatly reduced with store bought dough, almond cream, and caramel. But the homemade version is well worth the time. Plus this recipe makes two tarts. One for eating directly from the oven, the other is meant to be frozen and baked on a cold morning.

I have also wanted to try Aran’s Gluten Free Apple Hazelnut Oat Cake and Cider Baked Apples.

I had the pleasure of working with the very talented Trisha Jones earlier this Fall. She is self-taught photographer that strives for a more natural, less edited imaged to truly capture what is unique about the subject. Trisha resides in Three Forks, Montana and covers the valley shooting expressive portraits. Her ambition and energy is contagious and I hope to collaborate again. You can view some of her work on Instagram here and Facebook here. Thank you Trisha for this vibrant shoot.

Picking Apples

Apples

Apple Frangapaine Tart Drizzled with Salted Caramel

HOW TO MAKE IT….

1. Preheat oven to 350.
2. Make the almond cream. Scrape into a bowl and set aside.
3. Butter tart mold and make pate sucree dough.
4. Spread a thin layer of apple butter on the bottom of the crust and then refrigerate for 15 or so minutes. If you do not have apple butter, it can be eliminated.
5. While dough is chilling, peel and core 3 apples. Thinly slice and try to keep the shape of half an apple.
6. Spread half the almond cream on top of apple butter and arrange apples on top.
7. Bake for 40 to 50 minutes until crust is golden brown and the frangapaine is puffed and golden.
8. Make the salted caramel while tart is baking.
9. Drizzle salted caramel over tart and serve. Best eaten the day of!

Note: The second assembled tart can be frozen for up to 2 weeks. Bake directly from freezer, adding several minutes to baking time.

Apple Frangapaine Tart Drizzled with Salted Caramel

apples

WHAT YOU’LL NEED For the Pate Sucree Dough // Recipe from SF Baking Institute

329g (2 2/3 c.) all-purpose flour
142g (1 1/8 c.) Powdered sugar
1/2 tsp. Baking powder
1/4 tsp. Salt
148g (1 stick + 2 Tbs.) Butter
112g (~6 large) Egg yolks
1 tsp. vanilla
66g (2/3 c.) Almond flour

Sift the flour, powdered sugar, baking powder, almond flour, and salt and add to a mixing bowl fitted with a paddle.
Add the butter and mix on medium low speed until mealy (course corn meal texture).
Add the egg yolks and vanilla and mix on low speed until the dough comes together.
Divide dough into two equal discs. Use parchment paper to roll out. Sometimes I place a yardstick on each side of the disc while I roll out dough to help get the correct thickness (~1/4 inch). Do not pull or stretch dough when forming to mold. Trim edges at an angle starting with the outside. Place on a baking sheet. Makes (2) 4.5-inch x 13.75-inch rectangular tarts. I used this tart mold here.


WHAT YOU’LL NEED For the Almond Cream

1 stick of butter, room temperature
½ c. granulated sugar
1 egg, room temperature
1 ¼ c. almond flour
¼ c. all-purpose flour
1 Tbs. rum

Using a stand mixer, cream the butter and sugar. Add the egg and rum and scrape the bowl as needed. Add the almond meal and flour and mix until incorporated. Almond cream can be refrigerated up to 5 days or frozen for 2 months.


WHAT YOU’LL NEED For the Salted Caramel

½ c. granulated sugar
¼ c. cream
2 Tbs. butter
½ tsp. salt
½ tsp. vanilla extract

Heat a small saucepan over medium high heat. When the pan is hot, sprinkle a small amount of sugar into pan and allow the sugar to melt without gaining too much color. Continue to sprinkle sugar and swirl pan to fully melt each addition. Once all the sugar is completely melted, cook to a deep reddish brown. (Note: the lighter the color of caramel, the sweeter.) The color can change rapidly. Be cautious to avoid burning the caramel.

Remove from heat and add warm cream mixture in batches, stir rapidly. Be careful, the mixture will splatter and steam. Add vanilla extract and stir until smooth. Sometimes it helps to reheat the caramel after adding the cream mixture for a smooth consistency. Cool until slightly thickened. Caramel can be stored at room temperature for up to 1 week.

Apple Frangapaine Tart Drizzled with Salted Caramel

Vogue Gardening & Country Carrot Cake

October 12, 2014

Vogue Gardening

Can you believe my horse, Buddy, doesn’t like carrots or apples?

Carrots

I made this cake for my oldest sister’s birthday a couple weeks ago. It’s a traditional carrot cake with a couple twists. Currants in lieu of raisins, limited spices, and grated pear for extra moisture. I also included goat cheese in the frosting, unexpected tang with every sweet bite!

In case you want something less traditional, try this Cocoa Carrot Cake with Cocoa Crumble. I also made this a couple weeks ago for a party. Unlike the recipe, I baked mine in a 9”x13” pan for about an hour and cut into individual squares for serving. My take on a Coffee Cake with a W O W factor.

Celebrate the Indian Summer we have all been enjoying and EAT CAKE this week!

Black Betty

Country Carrot Cake // serves 12 to 15

1 ½ c. canola oil
2 c. sugar
3 eggs
2 c. grated carrots
1 c. grated pear
2 ½ c. flour
1 tsp. soda
½ tsp. salt
1 tsp. cinnamon
1 tsp. vanilla
½ c. currants

Preheat oven to 350 F.

With an electric mixer, mix together wet ingredients. Sift together dry ingredients and whisk together. Slowly add dry mixture to wet mixture in batches. Stir in currants.

Spray two 9-inch circular cake pans and line with parchment paper. Spray again and dust with flour. Divide batter into two pans and bake for 35 to 45 minutes. Insert a toothpick at 35 minutes. If removed and clean, cake is done baking. If not clean, bake for remaining 10 minutes.

Allow cakes to cool for 20 minutes. Run a knife along the edge and invert onto a cooling rack.

Frosting

8 oz goat cheese, room temperature
8 oz cream cheese, room temperature
½ c. butter, room temperature
3 Tbs. maple syrup
1 tsp vanilla
3 c. powdered sugar
¼ c. toasted pecans, for topping

In a mixing bowl with whisk attachment add cheese, butter, maple syrup, and vanilla and whisk until smooth. Add powdered sugar in batches and continue whisking until smooth and creamy.

I like to individually wrap the cooled cakes in saran and freeze before frosting. I think it makes frosting a cake a lot easier. I am not too methodical when it comes to frosting but here is a step by step process for mastering layer cakes.

Country Carrot Cake

Vogue Gardening – Wheat

September 29, 2014

Wheat

We finished seeding the wheat last week so I thought it appropriate I post the recipe for my favorite whole wheat crust. This is a family recipe that I often adapt with different ratios and flour types. I use the recipe shared here mostly for galettes since the wheat I use is stone ground straight from the field. The result is a grainy and rustic crust. Perfectly suited for a galette.

Ripe juicy peaches are the fruit of choice. But other stone fruits like plums, nectarines, or pluots are equally delicious substitutes. Since stone fruit season is near its end, apples might be the better option. Basically this is whole wheat crust recipe that can easily be adapted to suit the different fruit seasons.

I added a dash of ground tamarind to this peach galette. I first experienced tamarind while celebrating my sister’s marriage in the Yucatan. I had never heard of it let alone tried it. But if it was in the margarita form I was sure to take a liking to it! And indeed I did. Tamarind is a tree indigenous to tropical Africa but because of its many uses has spread worldwide in tropical and subtropical zones. The tree produces an edible, pod like fruit that is best described as both sweet and sour. I purchased my tamarind from Butterfly Herbs in Missoula, MT. A must stop for me every time I am in the area. The store has a whole wall showcasing a large variety of spices, teas, rubs, coffees, you name it.

Whole Wheat

Peach and Tamarind Galettes // makes 2 galettes and serves about 8 to 10

Crust

2 2/3 c. flour
1 c. shortening
1 tsp. salt
1 beaten egg for egg wash

Filling

6 ripe peaches
4 Tbs. honey
2 Tbs. tapioca flour
2 tsp. tamarind

Preheat oven to 400 F.

Cut the shortening into the flour with a butter knife until incorporated and about pea size. Add 7 to 8 Tbs cold water. Start with 5 Tbs. Continue to cut until flour, shortening and water come together. Add more water until it is sticky, but not too sticky. To check the dough, pinch with your fingers. If it stays together its done, if it falls apart it needs more water. Using your hands, form dough into a ball. Divide in two.

Lightly flour working surface and rolling pin. Roll out two crusts. I sometimes place a sheet of parchment paper on the counter with a little flour and roll out dough on parchment paper. Then the dough can be easily transferred to a baking sheet.

In a glass mixing bowl, core and thinly slice peaches. Add honey, tapioca flour, and tamarind. Mix so all peaches are coated.

Leaving a 2-inch border around edge, arrange peach slices close together in a circle on the dough. Arrange the remaining peaches in a smaller circle in the center. Fold the border partially over the filling, pleating the dough in loose folds. Brush the folded dough with a beaten egg. Slide the galette with the parchment onto a baking sheet. Bake the galette until the pastry edge is deep golden brown and inside is bubbling, 30 to 35 minutes.

I served warm with a dollop of plain Greek yogurt and a sprinkle of equal parts ground tamarind and sugar.

Peach Galette with Tamarind

No Bake Gluten Free Dairy Free Raspberry Tart

August 8, 2014

Part 3 of the Vogue Gardening Series features fresh raspberries.

Vogue Gardening

I have been picking raspberries for a good week now thanks to my good friends. Their garden is beautiful and their raspberry bushes are plentiful. The bushes were transplanted from the family farm in South Dakota. I was lucky enough to get a number of starters from them this Spring. Though alive and well, I can’t say my raspberry bushes were quite as bountiful as theirs. Perhaps in a couple years, til then, thanks for sharing your harvest.

When fruit is picked ripe and succulent straight from the tree/bush I resist changing its form from pure and fresh. I like to eat it raw so I can taste the freshness highlighted from a garden harvest. So this dessert is piled with fresh raspberries. Nothing to muddle the flavor but a hint of coconut and slight nuttiness from the crust. That’s why I love it. And who though gluten free and dairy free could taste so darn good.

This no bake tart is incredibly quick and easy.  Dessert without the repercussion of a hot house is incredibly nice during these dog days of summer. If you prefer something a little richer and more decadent, I could definitely taste this crust with an ice cream filling and chocolate sauce drizzled over the raspberries. Just a thought if you aren’t counting calories. Cause who really does, right?!

Vogue Gardening Raspberries

No Bake Gluten Free Dairy Free Raspberry Tart // serves 8 // Adapted from Sprouted Kitchen

Crust

9 dates, pitted
1 c. toasted almonds
1 c. almond meal
2 Tbs. butter, melted (coconut oil for dairy free option)
1 tsp. cinnamon
1 Tbs. unsweetened cocoa powder
1 tsp. vanilla

Add all ingredients to a food processor. Pulse until coarse and sticks together when you pinch it with your fingers. Depending on the moisture in the dates, a tablespoon or two of cold water might be needed.
Line the bottom of a 9-inch spring form pan with parchment paper. Pour mixture into pan and press into an even layer.

Coconut Cream

1 can coconut cream or full fat coconut milk, refrigerate over night
3 Tbs. powdered sugar
1 tsp. vanilla paste or extract
4 c. fresh raspberries

Scoop coconut cream out of can and discard liquid or use for smoothies or something of the sort. In a mixing bowl with whisk attachment, beat coconut cream on medium high just until peaks form. Add powdered sugar and vanilla and continue to beat until peaks form.

Spread coconut cream in an even layer on crust. Sprinkle 1 1/2 c. of raspberries on top and gently press into coconut cream. At this point I like to freeze for about 1 hour to get a good chill on the coconut cream. Remove from freezer and top with remaining raspberries. Refrigerate until ready to serve.

Store covered in the fridge for a couple days, if it lasts that long!

I used Trader Joe’s coconut cream. I absolutely love it. I have not found coconut cream anywhere else. So if you do not live near a Traders than use canned full fat coconut milk. Don’t forget to refrigerate over night so the cream can separate from the liquid.

Raspberry Tart a Pitchforks & Pomegranates

Rhubarb Raspberry Swirl Bread

June 24, 2014

Rhubarb Raspberry Braided Bread

I entered a baking challenge hosted by Joy the Baker and King Arthur Flour. The four part challenge is a way to bring bakers together. Fun right. So all I had to do was bake this Triple Berry Cinnamon Swirl Bread, take photos of the end product and then post them on Instagram using hashtag #bakingbootcamp. You can read more about the challenge here if you want to join in for the next three.

I didn’t have too many berries at home when I decided to make this sweet treat. But I still have, what seems, an endless supply of rhubarb. So I decided to make this a rhubarb raspberry swirl bread. I highly recommend trying this recipe. I can best describe it as a large rhubarb cinnamon roll. And since I love cinnamon rolls and by now you should know how much I love rhubarb, this is probably my favorite sweet treat to date. It basically gives you a reason to wake up in the mornings! You can find the recipe here.

Rhubarb Raspberry Twist Bread

Rhubarb and Raspberry

On a side note. Montana is looking stunning. Mother Nature has blessed us with ample moisture. The fields and hills are lush and green. The amount of feed available this year is exciting. The photos below were taken in what we call our dry land pasture. This means we do not irrigate it. Mother Nature does her work and we hope for the best. So far she is doing some of her best work for us.

It has been at least 1o years since I have spent an entire summer in Montana. And I rarely visited in June. I have no idea why not. Like I said it’s a gorgeous time of year and good energy vibes are everywhere with summer finally arriving. I recommend visiting this time of year. Just pack your rain slicker and boots.

Happy Summer Days!

cows

2 in 1 Recipe. Rhubarb Rose Lemonade & Rhubarb Curd Tart

June 15, 2014

rhubarb curd tart and rhubarb-rose lemonade

One of my best friends, fourth sister really, was visiting from California for a long weekend. She requested I bake a sweet treat. Normally this is not a problem for me. I have endless options when it comes to baking sweet treats. But, she is gluten free. And if you haven’t tried gluten-free baking, let me tell you it is an art in itself. You cannot take any good old recipe, substitute the all-purpose flour for gluten-free flour and think you are going to retrieve a master piece from the oven. It just doesn’t work that way. You really have to spend time in the kitchen experimenting with gluten-free flour combinations or just refer to the experts. And even then, I still think it’s a challenge.

Since time was limited I decided to refer to an expert gluten free baker for a rhubarb cake recipe. Let me just tell you that the entire cake stuck to the bottom of the pan. Feeling defeated but determined, I decided it was nothing raspberries and powdered sugar could not fix. It tasted divine and looked homemade! But for this post, I am sticking to what I know and that’s gluten. I have made this pate sucree dough many times. It’s tried and true. You can find the recipe here posted under the lemony tartlets.

And since rhubarb is in full bounty and I love it so much, I decided to make this a 2 in 1 recipe. I am giving you recipes for Rhubarb-Rose Lemonade and a Rhubarb Curd Tart. You use the rhubarb simple syrup for the lemonade and the strained rhubarb for the curd. It’s perfect really!

rhubarb

Rhubarb-Rose Lemonade

8 rhubarb stalks
1 ½ c. sugar
½ tsp. rose water
3 lemons
1 sparkling water

Remove leaves from rhubarb. Wash and cut into 1 inch pieces. In a medium sauce pan over medium heat, bring 3 cups of water, rhubarb, sugar and rose water to a boil. Reduce heat and simmer stirring occasionally until sugar has dissolved. Approximately 10 minutes. Remove from heat and allow rhubarb to seep for approx 2 hours. Strain before serving.

In a 1 gallon glass jar, zest 2 lemons and juice 3. Add the rhubarb simple syrup and sparkling water and then fill remaining jar with tap water. Refrigerate until chilled. Garnish with a lemon twist.

rhubarb curd tart and rhubarb rose lemonade

Rhubarb Curd Tart

Strained rhubarb from above simple syrup
4 egg yolks
1 Tbs. butter
1 Tbs. coconut milk

Preheat oven to 350. Follow pate sucree recipe here. Bake crust for 20-30 minutes until golden brown.
Puree rhubarb. I used a food processor. In a glass bowl, whisk together rhubarb puree and egg yolks. Place over a saucepan of simmering water. Stir until thickened. About 10 minutes. Remove from heat and add butter and coconut milk. Stir until incorporated.

Spread rhubarb curd into 4″x14″ tart shell. Bake for another 15-20 minutes until curd is set in the middle.

Swiss Meringue / from SF Baking Institute

166 g of sugar
83 g of egg whites

Combine the egg white and sugar in a mixing bowl. Place the bowl over a saucepan of simmering water and mix until egg whites and sugar reach 120F. Transfer to a mixer and whip on medium high until full volume and the meringue has cooled to room temperature.

Apply meringue to cooled tart and toast carefully with a blowtorch.

cardamom pound cake and GF muffins

May 12, 2014

My sister, Kelsy, and I were busy baking and our Mother was the taste tester. She approved.
My sister, Natalie, who is a Mother to a wild 8 yr old cowboy found this quote. I think she may be right!
“MOTHERS ARE ALL SLIGHTLY INSANE.” – J.D. Salinger
Happy belated Mother’s Day to all the slightly insane mothers out there!
muffins and pound cake
We tried three new recipes. A Cardamom Pound Cake. Recipe can be found here. And two different types of gluten free muffins. The Chocolate Coffee Peanut Butter Muffins and the Peach Coconut Almond Flour Muffins can be found here along with eight other healthy muffin recipes. Maybe you can try some of the others too and report back to me!

I made a couple slight adaptations to the Cardamom Pound Cake. Instead of Creme Fraiche and whole milk I used refrigerator staples, sour cream and 2%. And I substituted 1 cup of all-purpose flour for 1/2 cup of spelt flour and 1/2 cup of almond flour. Because it makes me feel healthier! The cake passed the taste test, but I forgot to serve it with some sort of cream. Clotted cream, whipped cream, ice cream…..You get the picture.

muffins
pound cake
Kelsy made a couple of adaptions too. Mostly to the flour combinations. For the Peach Coconut Almond Flour Muffins she used 1 cup of spelt flour, 1/4 cup of coconut flour, and a half cup of oat flour. She also used 1 whole banana and 4 peach halves from our canned peaches.
For the Chocolate Coffee Peanut Butter Muffins she used 1/4 cup of spelt flour, 1/4 cup of oat flour, 1/4 cup of coconut flour and 1/4 cup of ground flax seed. She also used 1 1/2 bananas. I am sure you could experiment with other gluten free flours too!

Copyright © 2024 Katie Sue Cooper. Theme by Maiden Sites